3.21.2014

happy.

After lots of work, cooking, and doing dishes this week, here we are, chilling at my mom's so Strider can watch endless bball (aka the perfect opportunity for me to catch up on reading some of my favorite blogs). 

My friday started at 6 am with a green apron and customers who apparently couldn't get their coffee fast enough. Normally, this is fine and just part of the barista job description, except mid-shift today I accidentally spilled dumped an entire 20 oz vat of boiling Blonde roast all over my hand slash apron slash pants slash everything. We were really busy so I quickly ran some cold water over my hand and kept going. 30 mins later my skin was still throbbing, red, and angry. I used a truly glorious burn cream which helped, but several customers were like: "What the deal, Sarah? Why no funny song and dance today with my latte?" Honestly, I wanted so badly to suggest that maybe if you're irritable and 20 min late for work, this isn't the best time to stop and stand in line for a hot beverage...or maybe, just maybe baristas are here to make coffee, not necessarily to memorize your name and complicated beverage while also performing a simultaneous comedy routine and motivational therapy session. However, I did not. And eventually we (my hand epidermis, crappy attitude, and I) got over it and enjoyed the rest of the day.

So now that I'm caught up on internet reading and my hand is all better, I'm just sitting here, rocking out to my new favorite song, watching the video over and over because it just doesn't seem to get old. The moral of the story is, even if your day started with a bath in 200 degree brown caffeine water, this song does exactly what it says: Happy. 

Simple and awesome for a weekend night. Let down your hair and dance around a bit.
"Let them praise His name with dancing and make music to Him with tambourine and lyre." -Psalm 149:3
Though Pharrell isn't exactly using a lyre or dedicating this jam to the Big Man, I'm taking it as full opportunity to revel in the love of my awesome Creator, in whom I find true joy.

Fun fact: my favorite scene is at 1:30-1:38. Just. so. awesome.
Happy dancin!


Note: The author does not endorse this musical artist as a whole. I just really like this particular song.

3.13.2014

diy framed chalkboard

For a while now, chalkboards have been making a huge comeback in home decor. And with good reason...they're super versatile and pretty! I've had my eye on a few ideas but I didn't want to jump in until I had a clear plan (a rare ideology for me). I had put the idea on a crafting back-burner until I recently saw a blogger who used a large chalkboard for quotes in the kitchen. Most kitchen boards just display the week's menu, but that's impractical for me since I know for sure that I would never get around to changing it every week. However, the idea of putting up a quote or Scripture is definitely one I can warm up to.

I started at our local thrift store to hunt down a frame but their prices were surprisingly high for scary motel art. I hopped over to Hobby Lobby just out of curiosity and found a gorgeous empty frame in the clearance section...90% OFF! Seven bucks later, I walked out with a frame and a plan. I measured the inner frame and went to Lowe's for an 18"x24" piece of plywood. I already had a can of chalkboard paint at home so that afternoon I was all set to start.
Two coats of paint later and I hit a huge speed bump. The paint was fine but the texture of the plywood was still coming through. Maybe this would have been remedied with 8-10 coats of paint, but ain't nobody got time for that!

I headed back to Hobby Lobby and ended up purchasing a dry-erase board with the same dimensions as the frame and since the board had a smooth chipboard back, I knew the chalkboard finish would be much cleaner. Using wood glue and a couple stacks of books, I adhered the dry-erase side of the board to the plywood. 

Next, I started over with the paint, using four crosshatching layers. While this was drying and we finally had a sunny day, I took the frame outside with some leftover soft-white spray paint. Once all the pieces were dry and gorgeous, I used a medium coarseness sanding block and lots of elbow grease to give the frame some character. 
The next step is very important -- priming the chalkboard. It says it clearly on the paint can, but for some reason, lots of people skip this step and then are frustrated when the chalk "stains" the board or it doesn't clean properly. Simply take a piece of chalk and rub it sideways across the entire surface of the board. Clean with a felt eraser then a wet rag and it should be good to go!
To attach the board to the frame, I laid it flat and used a staple gun to bridge the gap between the wood and frame. Inevitably, the board will not be flush with the frame, especially if you have someone at the store cut the plywood for you. That's okay though, cause no one will be able to tell from the front. Post-stapling the back looked a little like Frankenstein...but I wanted to make sure it was really secure since it's a bit heavy.
Then just flip it over and get creative! I opted for a Chalk Ink marker since I like the cleaner lines and no dust, but regular chalk will do the job too. This weekend, I'm getting hardware to hang it in the kitchen over our table, replacing the current poster, but for right now, it's in the living room. Ultimately, I'm aiming to put up a new bible verse at the beginning of each month. Our main door to the apartment opens into the kitchen and I spend lots of time in there now, so it's definitely the central location for Scripture to be seen. And what a promise to have hope in!
Cost (not including everything I already had at home):
Frame = $7 (originally $59.99!)
Plyood = $5
Dry-erase Board = $6
Total = >$20

Note to self: work on writing in straighter lines before showing off stuff like this. Oops

3.10.2014

blackout blessings

After yet another ice storm and two days without power, Strider and I are getting back to normal life. 
Can I just say, what is up with the South this winter?!
img source: newsobserver.com 3-7-14
Friday night we had an awesome sleepover with some of our best friends who graciously let us crash in the guest bedroom. For dinner, I made Turkey-Pesto Meatballs with spaghetti for everyone and it was delicious - definitely a new addition to the recipe binder. Plus, I got to have a cup of coffee Saturday morning on their couch with a very snuggly Reece beside me -- she's extra sweet-cakes in the a.m.! 

As Mark started making breakfast, we sadly had to rush out the door. I then proceeded to work a 14-hour event at my Events Coordinator job. Needless to say, I was thoroughly spent by midnight. However...I got a text from Strider an hour before I got off saying that our power had been miraculously restored. Praise God!

Weighing on my mind over these last couple days are the tons of posts complaining about the power outages...on Facebook...from their smartphones. Honestly, it made me pretty sad. Yes, not having electricity is a bummer. And yes, having trees fall on the roads and power lines is a inconvenience. But it appears that no one was hurt or lost a loved one. Property can be repaired, streets will be cleared, and everyone will be back online in no time. 
In the end...is it really worth getting so upset over?
Plus, while venting about how long it might possibly take to restore everything, let's pause together and think of the dozens of people out dealing with live wires and dangerous conditions just trying their best to make it right.

But here we are at Monday. And with my rare and glorious afternoon off, I just spent 20 minutes hauling out basically every item in our refrigerator. Though I hate to do it, I am embracing the chance to get a jump on spring by cleaning out our fridge properly. I am taking advantage of the opportunity to not replace all the super-processed unnecessary items that my new cookbook-reading hobby has enabled us to do without. I am looking forward to a fresh start Monday in my kitchen (which my sister always says is a great day to start things). And I am really loving that after a weekend of darkness and ice, today it is 70 degrees and the windows of the apartment are thrown open. Because after all, when you weigh a couple days without power against everything else in the world, I don't have room to feel anything but extremely blessed.

And to all the city employees and energy company workers out there that have worked so hard over the last 48 hours, who probably feel like there is still an insurmountable amount yet to be done...I truly and deeply appreciate you. I could not do what you do and I am filled with gratitude. If it were up to me, there'd be free Starbucks in it for you all! Since it isn't, I hope a simple "thank you" can suffice.

3.06.2014

diy recipe binder

I love public libraries! Have I ever mentioned that before? What a truly brilliant invention, enabling access to endless amounts of information and entertainment. Including...cookbooks. I mean, who has $25 to $40 to spend on a book that you may only like a quarter of the recipes in? Not me. So, as I've been going through stacks of fabulous cookbooks from the affectionately named P-Lib, I need a place to store all the recipes I photocopy (plus, I love making notes on ones I've tried). Cue a glorious organizational project: the DIY Recipe Binder!

There are a million different tutorials for similar binders, so just find something that works for your individual cooking style. First, figure out how many sections you want. Though I got a little overzealous with the dividers, you can use all or some of the following and combine those that you might not use as often:
Breakfast, Breads, Salads, Soups, Pastas & Pizzas, Beef & Pork, Chicken & Turkey, Seafood, Veggies, Sides, Crockpot, Cakes & Cookies, Pies & Pastries, Other Desserts, Canning, Kitchen Tricks & Info, and Other

I used an extra 3-ring binder I had at home, then headed to Hobby Lobby and Office Depot to pick up other supplies: scrapbook paper, dividers, and page protectors. Regarding paper, choose one per section, plus one for the front cover. I used the larger pieces and cut them down to size, but you could easily just get 8.5"x11" and skip that step.
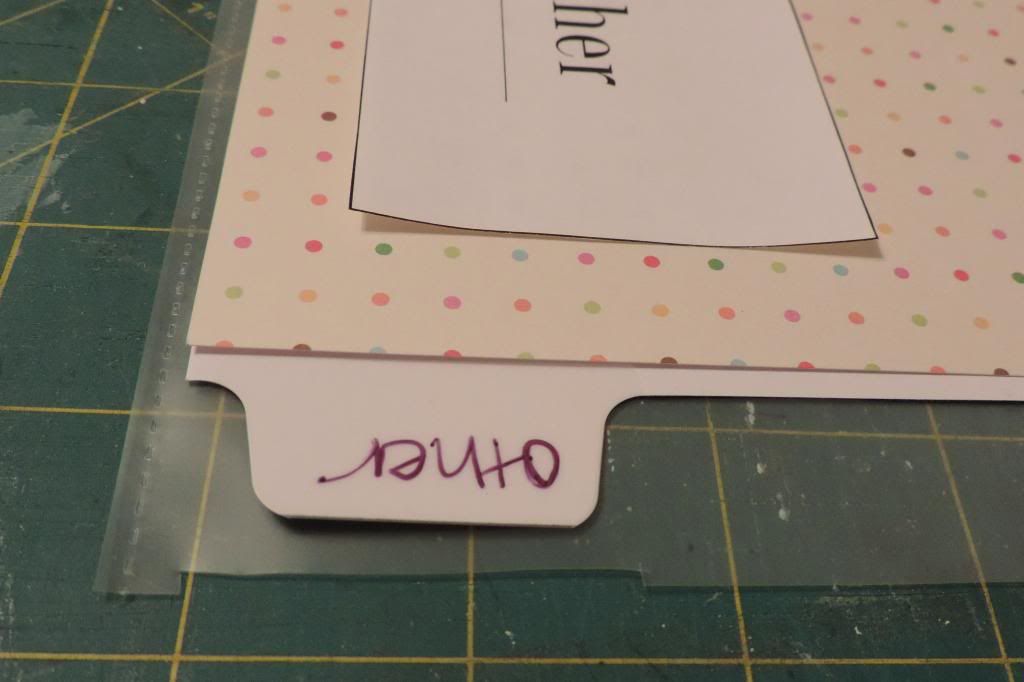
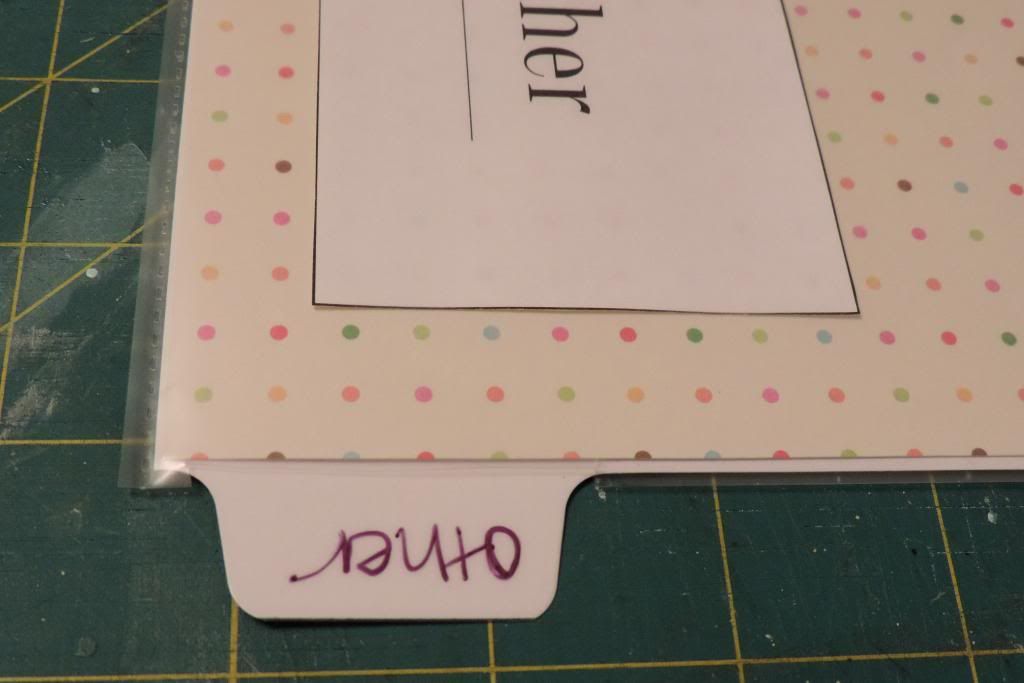
Taking a clue from another brilliant blogger (which I don't remember the name of at the moment), I decided to put the dividers into page protectors as well as the recipes, so that the tabs stick out further than the recipes once in the binder. To do this, lay each divider out on top of a page protector, then cut a 1.5" notch out of the edge of the protector so you can feed the tab through the notch once it is inside the sleeve. If this is confusing, see the before and after below. Just make sure not to cut all the way to the bottom or top of the protector sleeve.
I made simple square labels for each section in Word then just did handwritten labels on the tabs. Just tape your labels onto the scrapbook paper, line it up with the divider page, and slide it all down into the same protector sleeve. This is a little awkward at first but gets easier the more you do. Use the remaining sheet of scrapbook paper for the front of the binder and the spine. All done!
Project cost: $0 binder at home, $5.50 for scrapbook paper, $5.50 for 16 dividers, $12.50 for 100 protectors = $24 for a collection that will last ages! Now, just add recipes as you find ones to try or to store ones that you already love. 
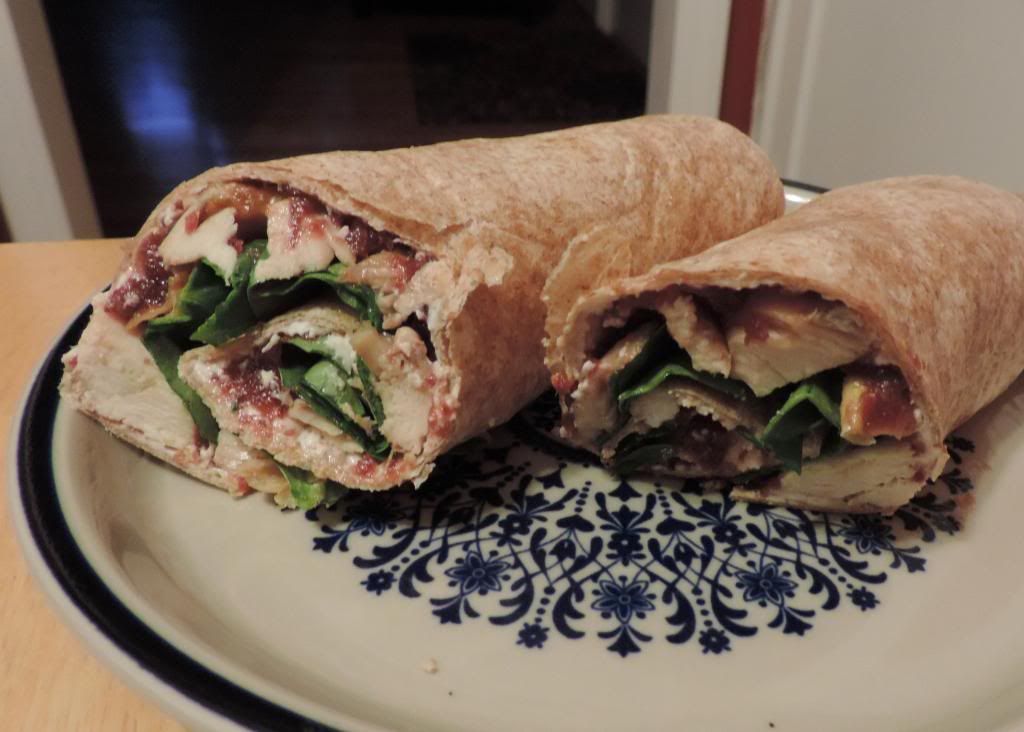
For example...these super tasty wraps Strider and I enjoyed for dinner last night!

Chicken-Spinach Wraps with Cranberry Chutney 

For chutney:
1 cup dried cranberries
2 Tbsp balsamic vinegar
1/2 to 1 Tbsp brown sugar (recipe called for 2 but we felt it was a little too sweet)
1 chopped shallot
1 tsp grated orange zest
a pinch of salt

Combine all the above in a small pot with 1/2 cup water. Bring it to a boil, cover & reduce heat to med-low for 5-8 minutes. Remove from heat and let it cool. Transfer to a food processor and pulse until it reaches the consistency of jam.

To assemble wraps, spread whipped cream cheese over a wheat tortilla, spread chutney over that, add chicken or turkey breast and a small handful of fresh spinach leaves. Carefully roll it all up and enjoy. Easy, fairly healthy, and delicious.