

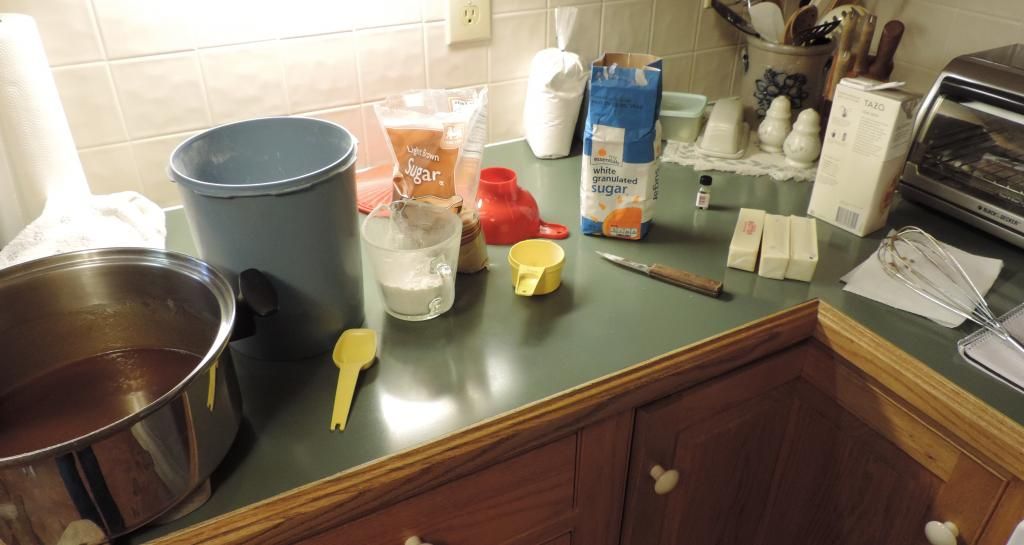
To start off, we gathered our materials and washed our combined bushel of apples. That's right, a "bushel of apples", as in not a math word problem, the actual measurement of "a bushel" (which may I add, I definitely thought was only used on elementary school math worksheets, not in real life). Purchased from a nearby orchard, our bounty cost a total of $16.
With a plan to gift some "apple pies in a jar", I set to work cooking up enough filling for six pies using this recipe from last fall: Caramel-Chai Apple Pie. Yummm! Meanwhile Strider's mom used a tabletop apple peeler/slicer/corer contraption which we both agreed was one of the handiest fall baking inventions ever.
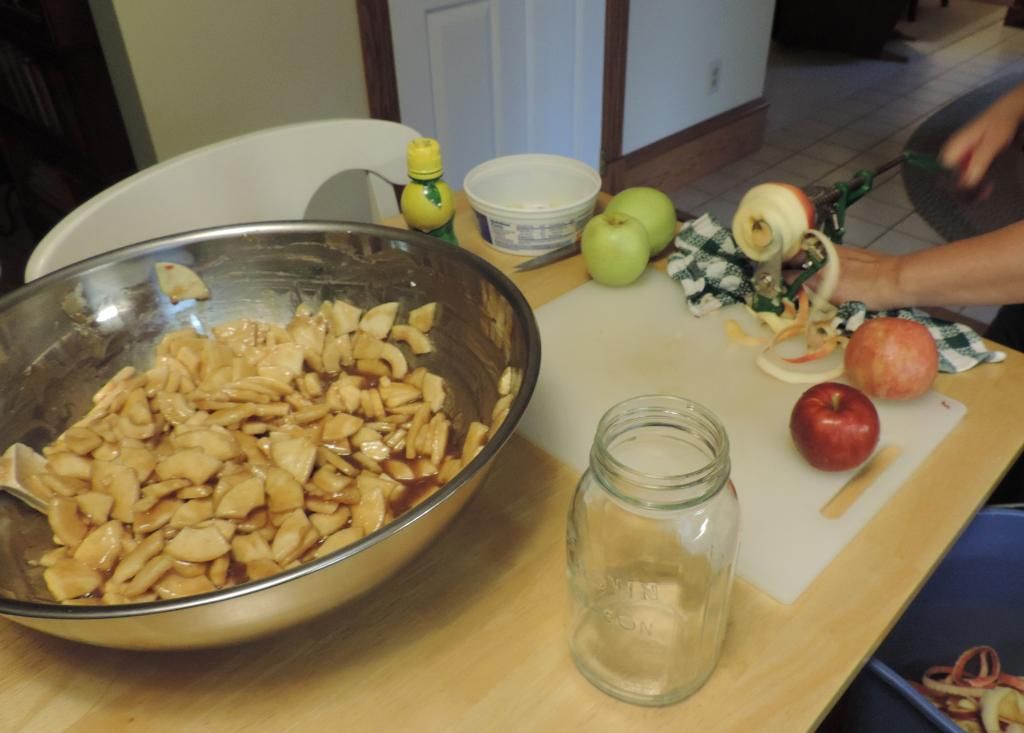
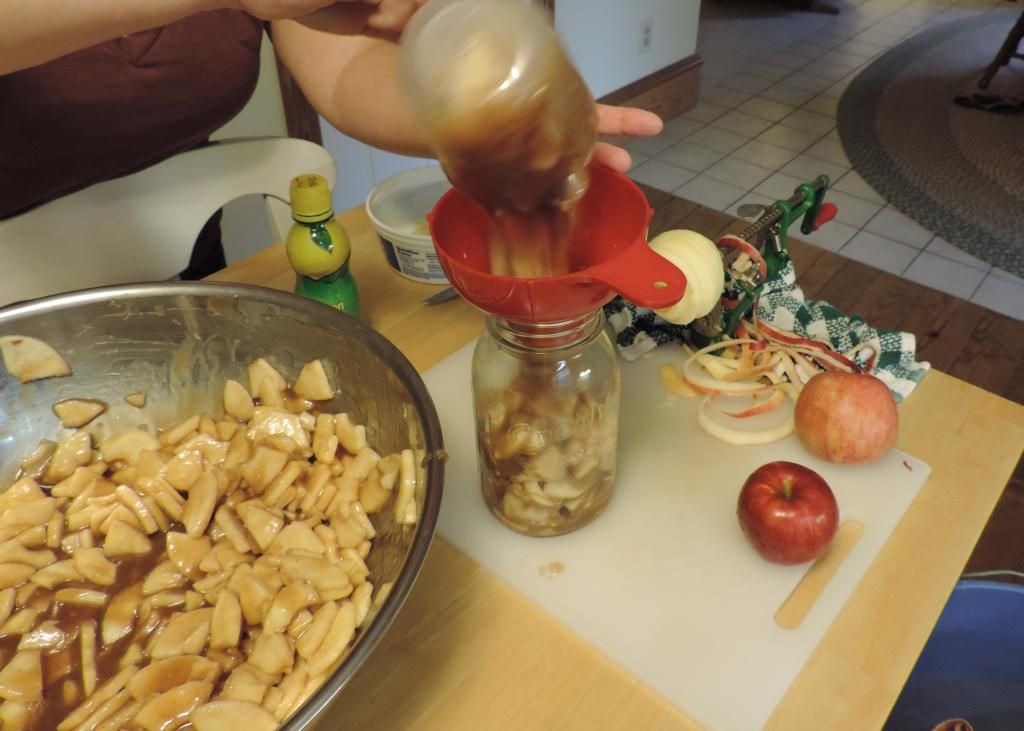


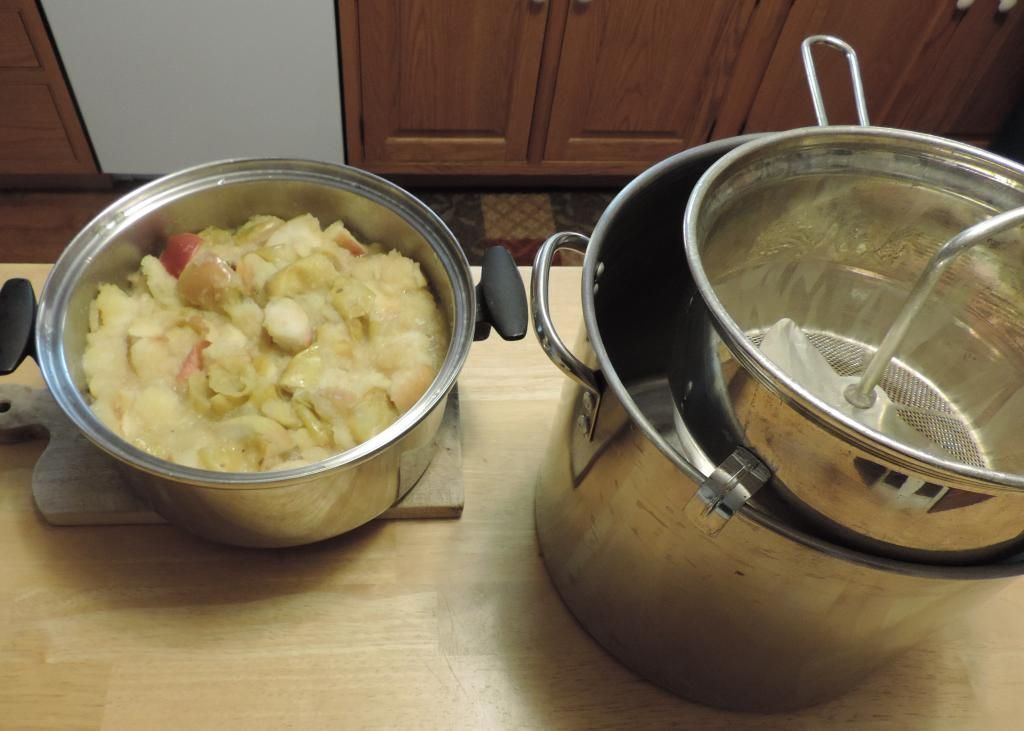

Working in two batches, we combined 12 apples with a pot full of filling in a large steel bowl. Then, using a canning funnel and a measuring cup for scooping, we filled the jars until just below the bottom rim line.
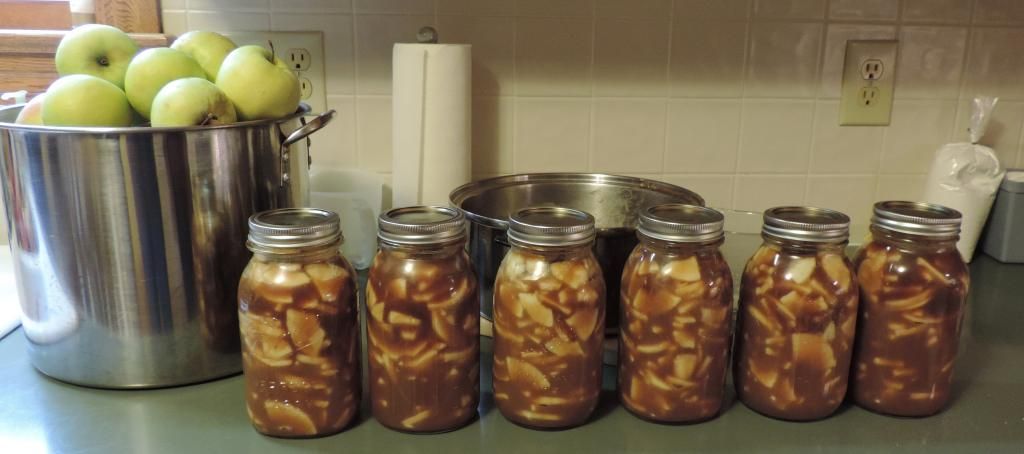
After all the jars were filled, we cleaned up the rims, secured the jar rings, and started heating up the water in the canning pot. All six jars used up a little over half of one half-bushel of apples...also known as one peck (also not just an obsolete term utilized by sneaky math teachers - who knew!)!
Once the water was boiling, we gently lowered all six jars into the rack. Upon reflection, we realized that we could have probably fit a seventh jar in the center but that six had worked out better for the filling recipe conversion math.
After 30 minutes at a rolling boil, we used canning tongs to very carefully lift each jar out of the bath and set them on the counter. Then began the wait...the agonizing minutes of anticipation and eagerness to hear six "POP"s that would chime the successful sealing of each jar.
As we waited, we set to work on Apple Project #2: Homemade Applesauce!
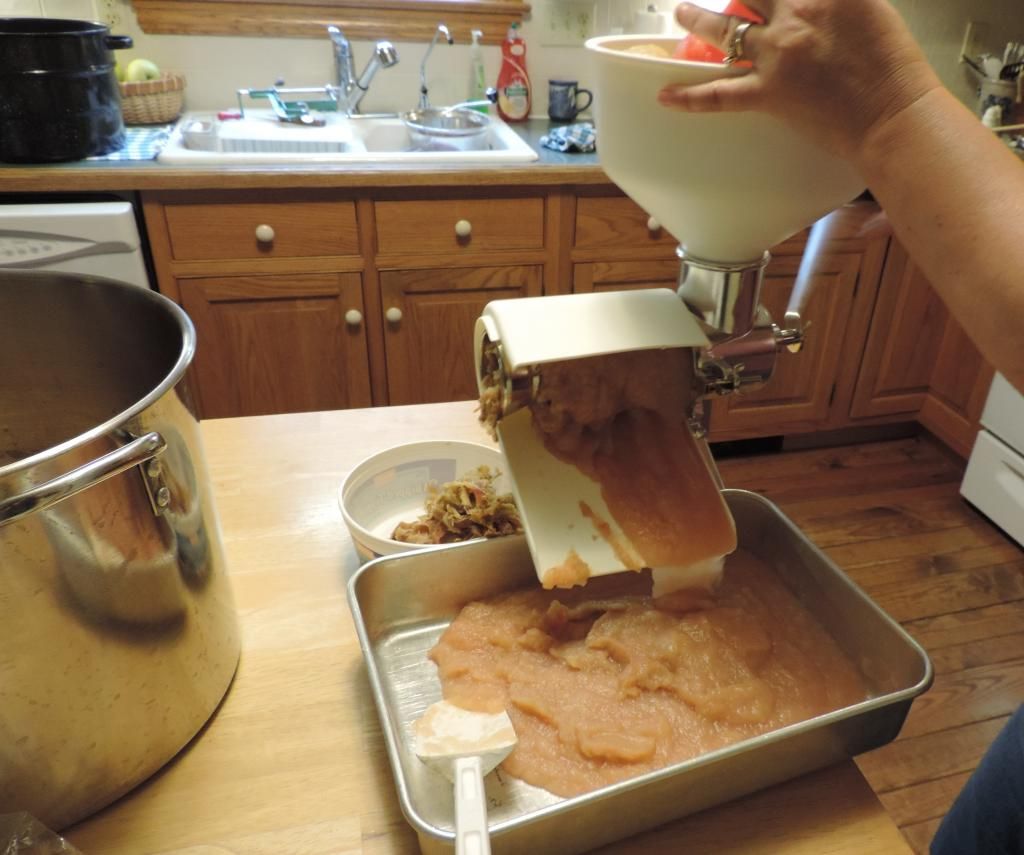
After spending a good while chunking the remaining apples into pieces (with cores and skins included), we filled a large pot with apple chunks and just a bit of water and set it over med-high heat. Once the entire pot of apples had cooked into mush, Strider's mom showed me how to use the hand-crank food mill to separate the applesauce from the cores and skins destined for the compost pile.
We worked for a while with success. But it all came to a grinding halt (excuse the pun) when the (admittedly a bit outdated) food mill conceded defeat to the apples and broke completely in two. With two huge pots of apples still to go and a giant mess in the kitchen, we switched the oven off and drove to the restaurant supply store that happens to be less than 5 minutes from the house. (An incredible blessing in location!) After purchasing a newer style mill, we made fast work of the rest of the apples.
You can see from the picture above how the mill separates the pulp from the sauce as you turn the crank. Interestingly enough, the apple sauce in this picture looks much redder than the other as there were more red apples cooked down in this pot. Working in smaller batches, we combined all the applesauce into a large stock pot so all the different kinds of apples' sauce got mixed together.
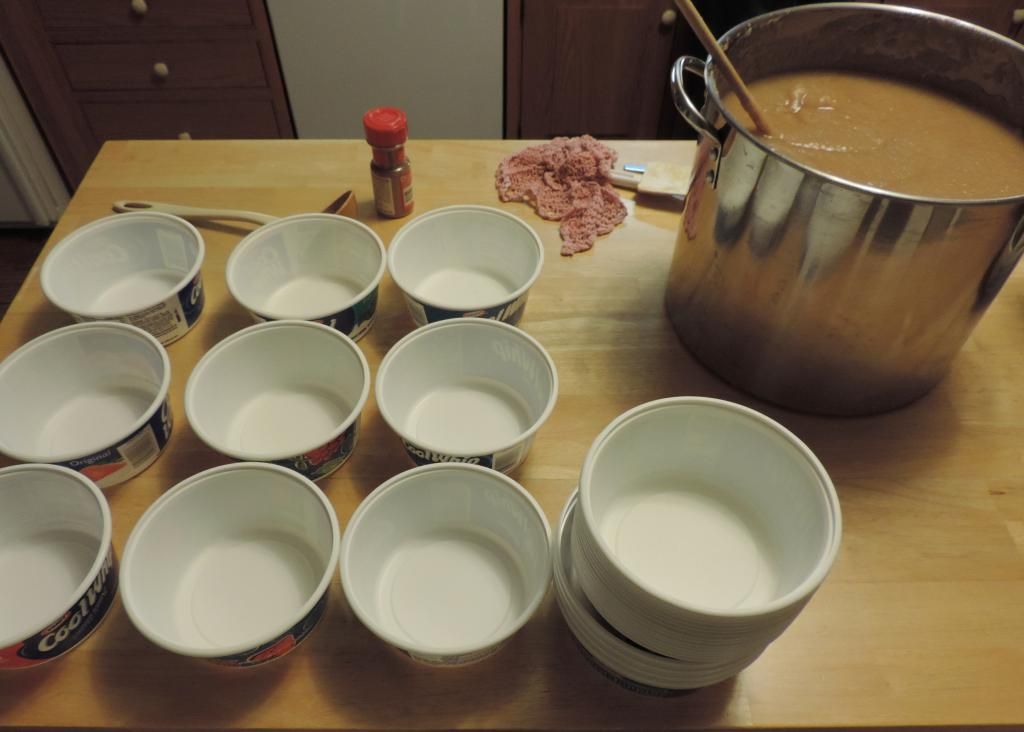
Using old whipped topping containers, we separated all the applesauce out into freeze-able amounts. Though we did add a little sugar to the sauce (probably 1 cup for the whole stockpot so still loads less than store-bought), it was actually sweet enough that you don't necessarily have to add anything. When it was all said and done...
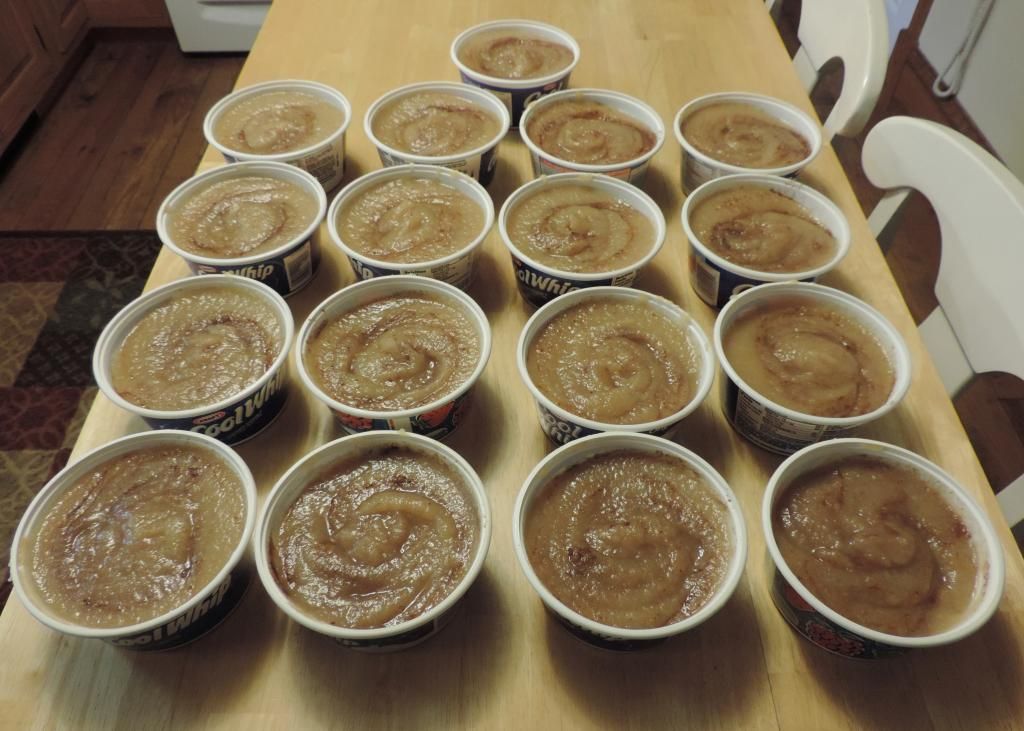
...we ended up with 17 containers of applesauce! I added a quick swirl of cinnamon to each container then we arranged them all into the freezer. Strider's mom assured me that it stays delicious for a long time when frozen this fresh and that this amount usually lasts them all year. After numerous taste tests, I can assure you that it definitely won't last a year in our freezer, but it's easily a much more nutritious and cost-effective method than the snack cups Strider and I usually enjoy at home.
Don't think we forgot about those jars either. Sadly, only four out of six sealed properly. One, we believed we over-filled in our eagerness, and another had an issue with the lid -- both great lessons to learn from for next time. Plus, I used the contents from one unsealed jar to make a test pie Friday night, and the other got transferred to a plastic container and frozen for another fall baking day...definitely counting it still as a win!
Add some homemade tags with baking instructions on the back and voila! nifty gifts to send home when my sister and her husband come to visit in a couple weeks. Homemade apple pie canned with local PA apples less than 24 hours from the orchard...at about $4 per jar to make, this was an easy and extremely fun gift to put together! Canning the pies only took around an hour of hands-on time as well so if you were feeling particularly industrious, you could make many more than this in just one afternoon.
Canning is a whole new world to me but with lots of farm markets nearby and a wealth of canning knowledge in Strider's mom and Grammy, I look forward to seeing what our pantry looks like this time next fall!