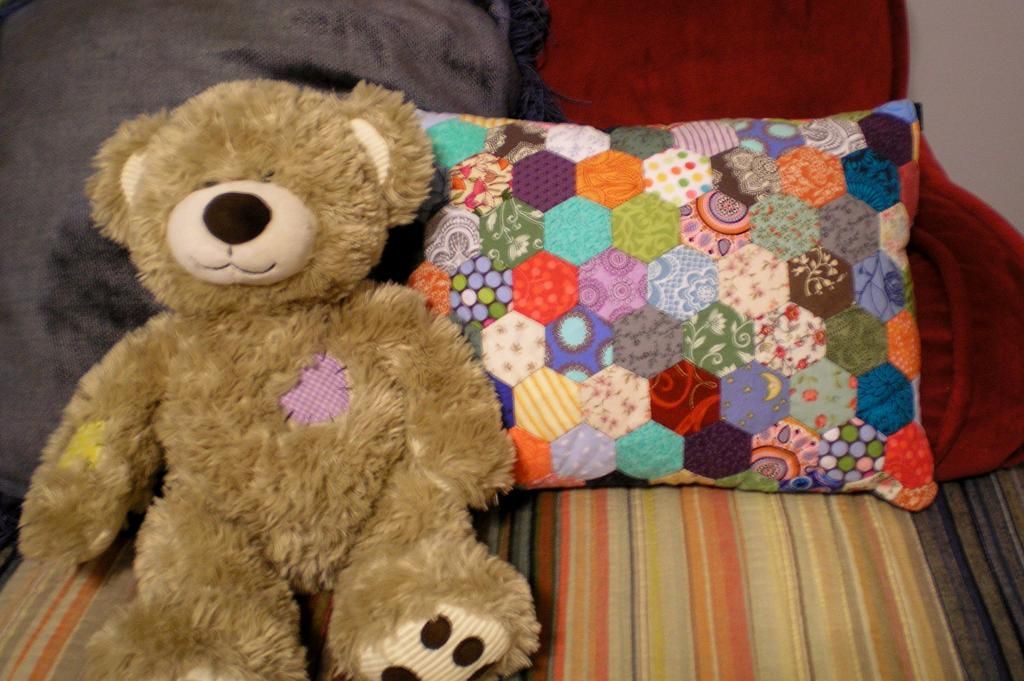
That's right, my first foray into English Paper Piecing is finally complete! After a ridiculous amount of microscopic stitches and a few months of being too busy to work on it at all...Project Hexagon Pillow is finally done!
I originally mentioned this project way back in February. The original picture used in that post was lost so I don't have the beginning bits to show you again here. If you're dying to see if, you can get a glimpse in the original post.
I'd been seeing a lot about paper piecing and "cute hexies" on the sewing blogs I follow and I decided this would be a nice challenge to expand my needlework skill set. To get started, I googled "paper piecing hexagons tutorial" or something of the like and read about a million different takes all explaining very subtle differences of how to do basically the same thing. Instead of failing to accurately explain it myself, I'll refer you to these awesome tutorials for your viewing pleasure:
Jay Bird Quilts hexagon tutorial
Amy Gunson extensive hexagon tutorial
FaveQuilts paper piecing tutorial
Sew (buh dum pssh)...after an inordinate amount of whip stitching to get all the little buggers together, my finished pillowcase front ended up being 9 rows by 10 columns (90 hexagons total). I decided on the fit by laying the ever-growing hexagon group across a 12" x 15" pillow form - just make sure to leave enough room for seam allowances and such...even if it means sewing an entire extra row of hexagons you know will mostly get cut off. Ugh!
Next, I chose a calmer grey polka dot cotton for the backing to balance all the crazy colors on the front. Add a zipper (another recently acquired skill you can see from the picture that I've yet to perfect), trim the excess - even though I was so sad to cut into all those hard-earned hexagons, flip it inside out, and call it a day!
Yay for finished projects! And yay for this colorful little pillow I use it during my reading-before-bed time.
Helllooooo! Wedding planning is going very well and with unemployment comes lots of other projects to keep me busy (though hopefully the unemployed bit will be very short lived). I have fun pics from a few projects but today I wanted to share a project I actually completed quite a while ago -- my "Be My Bridesmaid? Boxes". I've seen this idea floating around the crafty internet space for a while, but since I decided to put my own spin on it, I figured I'd share. Plus, now that the girls have all received them, I can finally post without spoiling anything.
The main Pinterest ideas I saw were either boxes with all the wedding info (their dresses, colors, etc.) or more alcohol/time-for-the-girls-to-party based. Since I didn't have much of the wedding info at the time and since the latter is not my style, I decided to just create fun boxes with little treats for all the girls. Naturally, the first stop was a trip to Hobby Lobby!
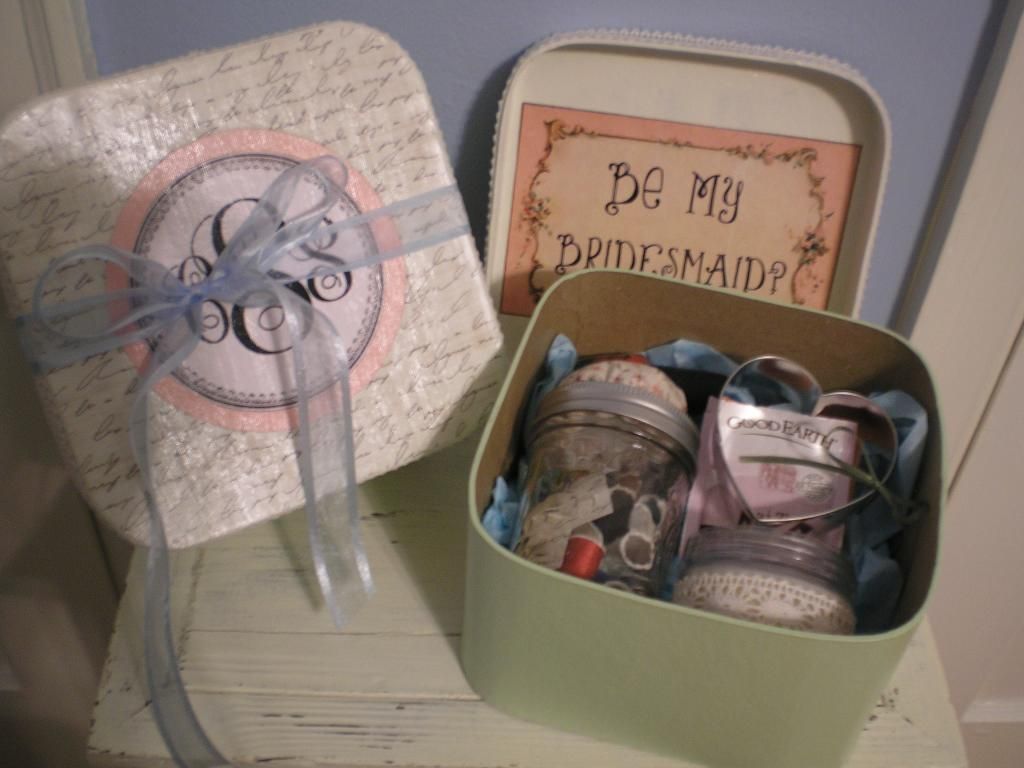
I used inexpensive pulp board boxes as my base (less than $2 each). Then, I hand painted each box green with a soft white lid. With 2 pieces of scrapbook paper (the handwritten looking one and the pink circle - 10c ea), a little photoshop magic, and modge podge, I finished the lids with each girl's monogram. Add some hot glued lace ribbon and a blue finishing ribbon ($5) and you've got a great outside!
Next was the super fun part - the gift itself! First, I used a label from The Graphics Fairy and a little photoshop to create the inner lid label, more modge podge to seal it on. (For the record, only my sister's box said "Maid of Honor", the rest said "Bridesmaid".) Box goodies include:
#1. small nail polish (confession...dollar store)
#2. two teas (from my collection)
#3. mason jar sewing kit: I had the jars already, got the kits for $3 at Hobby Lobby, and
used this tutorial to refinish the jar lids into pincushions with fabric from my stash
#4. a heart-shaped cookie cutter from Hobby Lobby (50c ea) with a small green bow tied to it
#5. a candle (dollar store) with a bit of leftover lace from the box lid hot glued to dress it up
Add a little sprig of silk flowers from a wreath I made last spring and a bit of tissue paper, tie it all up, and it's ready to go! The girls really seemed to like them (or lied cause they love me haha) and truthfully, each box cost less than $8 to make. It was a fun way to ask them to join the bridal party and a great way to start off my handmade wedding!
I hope you like them too and feel free to comment with questions if you want tips or ideas on making your own! Plus, do you remember all those crazy hexagons I was sewing when I wrote this post back in February?! Well, I finally finished that project and will be posting the results of my paper-piecing hard work later this week. Whooo!


