9.25.2013

winner wednesday!

I actually really wanted the title of this post to be "Winner-Winner-Chicken-Dinner Wednesday" but felt like it was a tad bit (sarcasm) too long. Either way, I am very excited to say:
CONGRATULATIONS!
to my first-ever giveaway winner...Susan O! Check your email and you should have a note from me with instructions on how to get your awesome autumn giveaway set.


Thanks everyone for reading and keep an eye out for more fun giveaways in the future. 


9.23.2013

diy autumn coasters & my first giveaway!

Autumn is officially here and I could not be more excited!! 55 degrees outside, cup of coffee in hand. More accurately, this is me -------->

So...to commemorate all this excitement, I have a fun, cheap, and easy DIY project to share: 
Handmade Tile Coaster Sets 

Naturally, I saw the idea somewhere else online (probably Pinterest) and there are a lot of tutorials out there, but this is the way I've found works best.

Materials needed:
- 1 to 4 sheets of scrapbooking paper depending on if you want all the coasters to match or to create a themed set like I did (approx $0.30 each)
- jar of matte finish Mod Podge ($4 and up at Hobby Lobby)
- 1 to 2 small sheets of felt in the color of your choice ($0.25 each at Hobby Lobby)
- hot glue gun and glue sticks (ranges in price but I have a $3 mini one)
- 4 to 6 tiles depending on how many coasters you want in your set (the cheapest ones at Lowe's are labeled 4"x4" Biscuits and are $0.16 each)
- small can of clear satin water-based Polyurethane ($7 at Lowe's)

  • Start with a trip to Hobby Lobby. Spend forever picking out your paper, decide how many coasters you want, and end up buying something unrelated just because it's Hobby Lobby.
  • Take everything home and set it all out on your desk. Breathe in the inevitable, glorious anticipation that comes with the beginning of a new project. Then, proceed to cut out 4"x4" squares of the paper and felt.
  • Wipe the tops of the tiles off with a dry cloth to remove Lowe's dust, and use a thin coat of Mod Podge to apply a paper square to the top of each tile. Set them aside and let them dry.
  • Once dry, apply a thin coat of Mod Podge to the whole surface of the tiles, especially around the edges of the paper to seal them. Let dry.
  • Next, apply 2-3 coats of Polyurethane to each of the tiles. Mod Podge is great as a basic crafting glue but it isn't really waterproof - the Polyurethane helps seal the tiles so they're safe to use with drippy, condensation-ing drink glasses. Let dry fully between each coat.
  • Once everything is totally dry, use your hot glue gun to apply one felt square to the back of each tile so they don't scratch furniture.
  • Stack them up and impress your guests with your crafty awesomeness! (and secretly love the fact that, all told, you only spent about $3)


And since fall is here and I made these coasters for no real reason, I am super excited to announce:
the first-ever giveaway on A Song for the Birds!
That's right, this super cool autumn coaster set can be yours! Plus, a pair of snuggly socks and 
NC local bath salts...man is that a great giveaway, am I right? 
Just leave a comment below letting me know that you were here and by Wednesday, 
I'll randomly select one reader to win! Plus, who knows...I may throw in some other awesome stuff as a last minute 
surprise (wink!). Just my way of saying thanks for reading and that I hope your autumn is awesome!


**Edit 9/25/13 - This giveaway is now closed. Please keep reading in the future for more giveaways, tutorials, and other random fun stuff. Thanks!**


9.16.2013

autumn baking kickoff - part 2

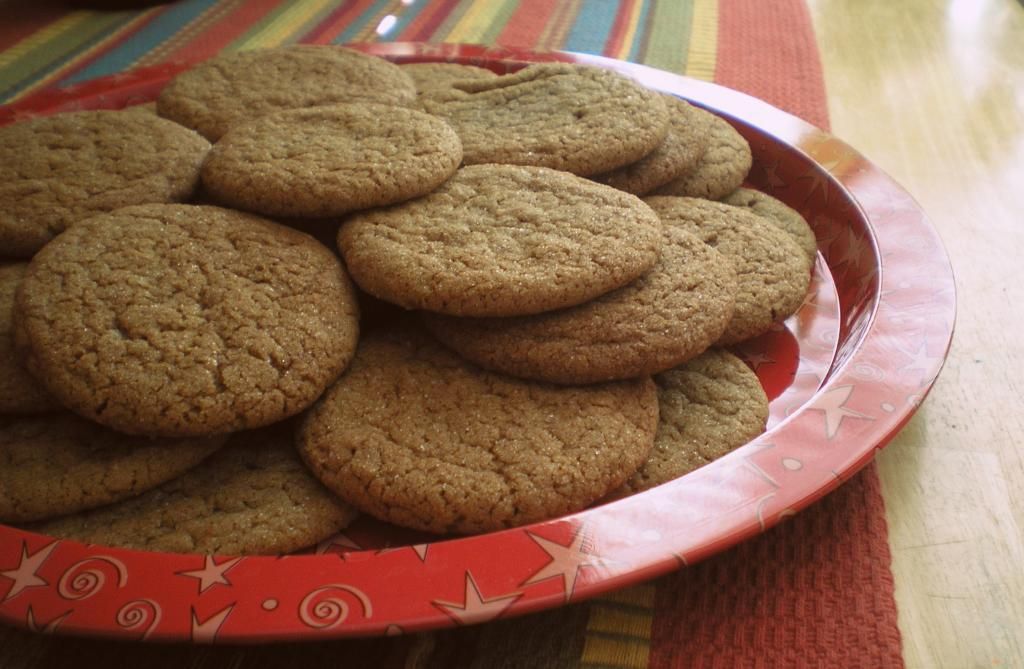
Super-Spice Molasses Cookies
I love for things that are meant to be spicy, to really pack a punch. As a rule, I always use lots of extra chai when I make my morning drinks, hot or cold. As such, I've looked for a while for a truly spice-featuring autumn cookie that is still soft and chewy, regardless of when it is eaten. And I found it all in this incredible and easy recipe!

Ingredients:

2-1/4 cup all-purpose flour
1/2 tsp each: cinnamon, ginger, allspice, cloves, nutmeg
1 tsp baking soda
1/4 tsp salt
3/4 cup softened unsalted butter
1 cup sugar and 1/4 cup sugar divided
1 egg
1 tbsp orange juice or orange liqueur
1/4 cup molasses

  • Whisk together all the dry ingredients.
  • Cream the butter and sugar together till fluffy, add the egg, then orange juice/liqueur and molasses. 
  • Gradually add dry ingredients to butter mixture. 
  • Refrigerate 45 minutes. (This is important because otherwise the dough is too sticky to work with.)
  • Roll dough into 1" balls then press into discs.
  • Cover with 1/4 cup sugar and place on baking sheet about 2" apart.
  • Bake on 350 for 8-10 minutes.

I personally think these are perfect for dipping in what I call "Snow Cream Steamers"...just a cup of milk with a tsp of sugar and vanilla extract heated up like hot chocolate. Excellent for snuggling up with a book!

9.15.2013

autumn baking kickoff - part 1

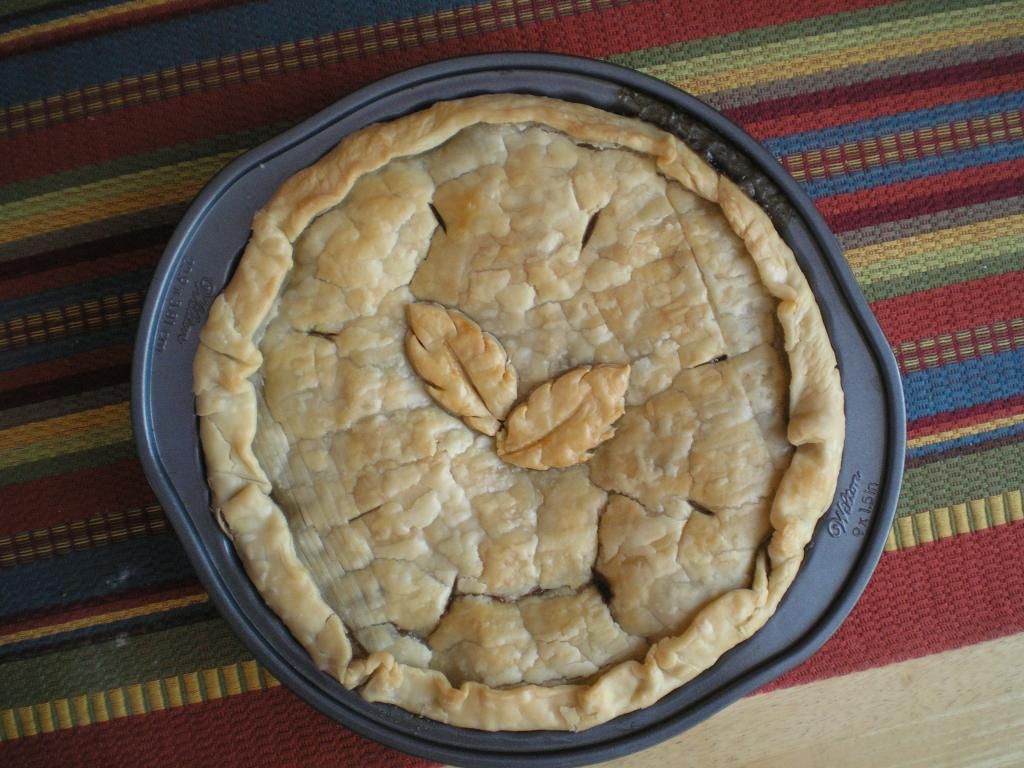
Caramel-Chai Apple Pie (super tasty and it rhymes to boot!)
This weekend my amazing friend Kirsten's birthday was serendipitously accompanied by a drop in temperature significant enough to merit the official kickoff of the autumn baking season! As such, I am happy to have two incredible recipes to share. Though it may sound totally nuts from the name, I can promise you that this is the very best apple pie I have ever made. Ever.

Ingredients:
Pillsbury 2 ct. refrigerated pie crusts
1 egg white
1/2 cup unsalted butter
2 tbsp unsalted butter
3 tbsp all-purpose flour
1 tbsp pure caramel extract
1/2 cup chai concentrate (Tazo or Oregon Chai are both great)
1/2 cup granulated sugar
1/2 cup brown sugar
1/2 tsp each: cinnamon, cloves, allspice, nutmeg
4 granny smith apples, peeled and thinly sliced

  • First, set your crusts out for 15 minutes to bring them to room temp. Normally, I'd harp on the importance of handmade pastry but frankly, these are easy and delicious and I'm giving myself a free pass since the rest of the pie is from scratch. Unroll one crust, line your pie pan, and brush it with egg white.
  • In a medium saucepan, melt the 1/2 cup butter and add the flour to make a paste. 
  • Add the caramel extract, chai concentrate, both sugars, and the spices. 
  • Stir and increase heat to bring to a light boil then reduce and simmer, continuing to stir so the sugar doesn't burn to the bottom. Cook on low for 5-7 minutes then remove from heat.
  • Line the bottom crust with a layer of apple slices (I think it's essential to keep the slices thin) and pour 1/4 of the filling mixture over them. Repeat layering apples and filling till full.
  • Cut up the 2 tablespoons butter and dot the top of the pie.
  • Unroll your top crust and either use it whole or cut up into a lattice. 
  • Brush the entire top with egg white and then poke vent holes.
  • Bake on 350 for 1 hour. Cool to room temperature and *this is key*...let it set up for 5-6 or so hours before serving. 

It got rave reviews for me and thankfully, the birthday girl said she enjoyed her "cake".
Reheat a slice and top it with some vanilla bean ice cream...that's what I call a great way to start off fall!

8.09.2013

diy wedding shoes

A couple weeks ago my mom and I found ourselves browsing the shelves at Rack Room Shoes for those ever-stylish black "work-safe" tennis shoes we all know and love. (Ha!) Thankfully, I did find a pair but of course had to order them because if you're an almost 6-foot girl like me, you well know the struggling of finding anything in your size in-store. Regardless, we still had the option to take advantage of the BOGO they were running so Mom brilliantly suggested we take a look around for some wedding shoes.

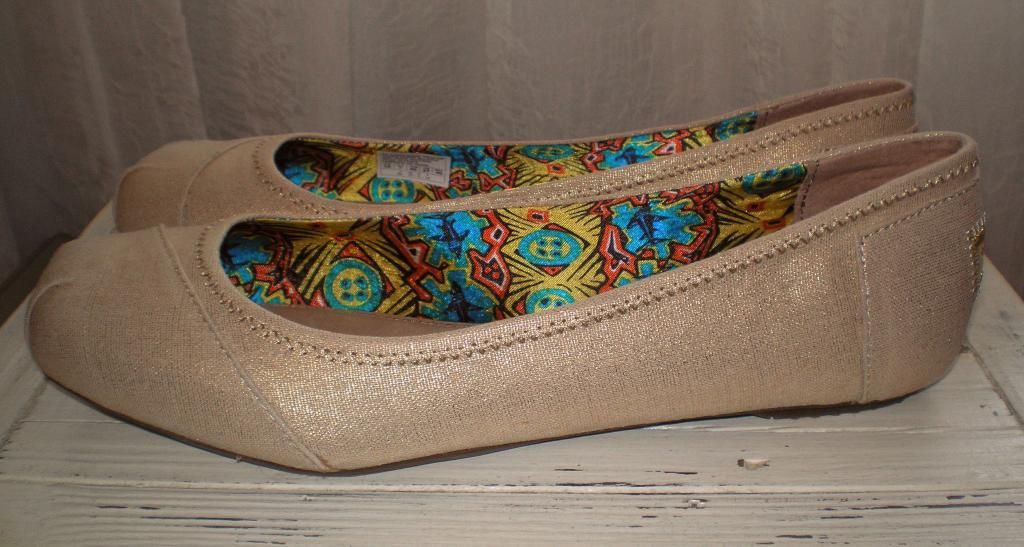
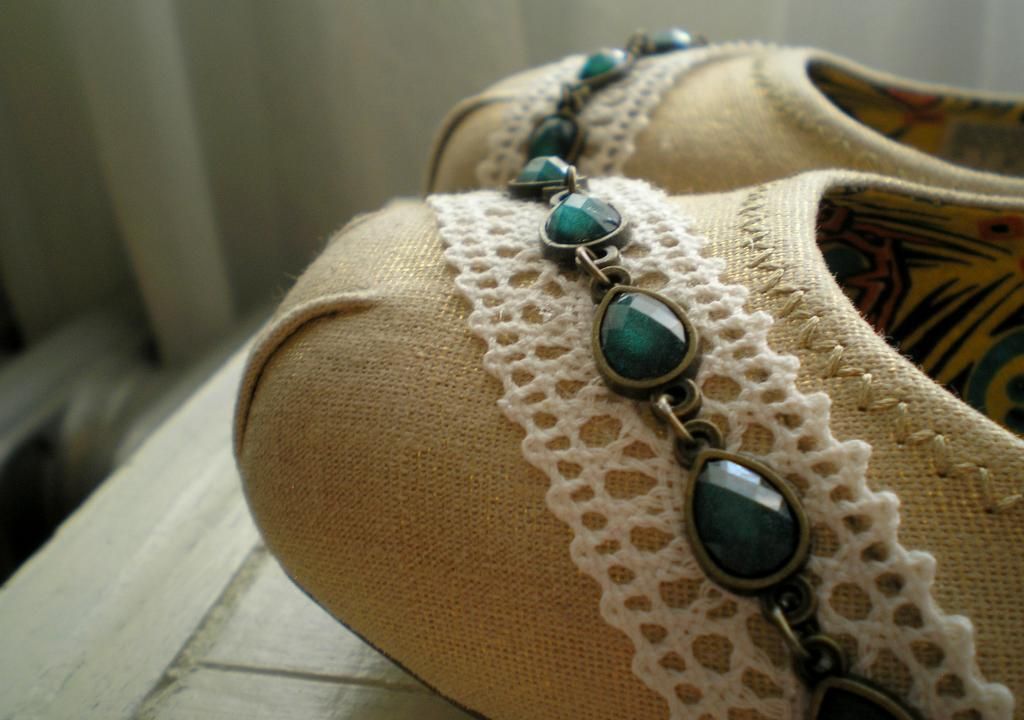
I knew I wanted flats but it seemed everything was either too plain or dripping with obnoxious glitter and rhinestones. So...I landed on this pair of fake Toms (Bobs) in an unassuming champagne color and set my brain to craft mode. Normally $39, we snagged them for $19!
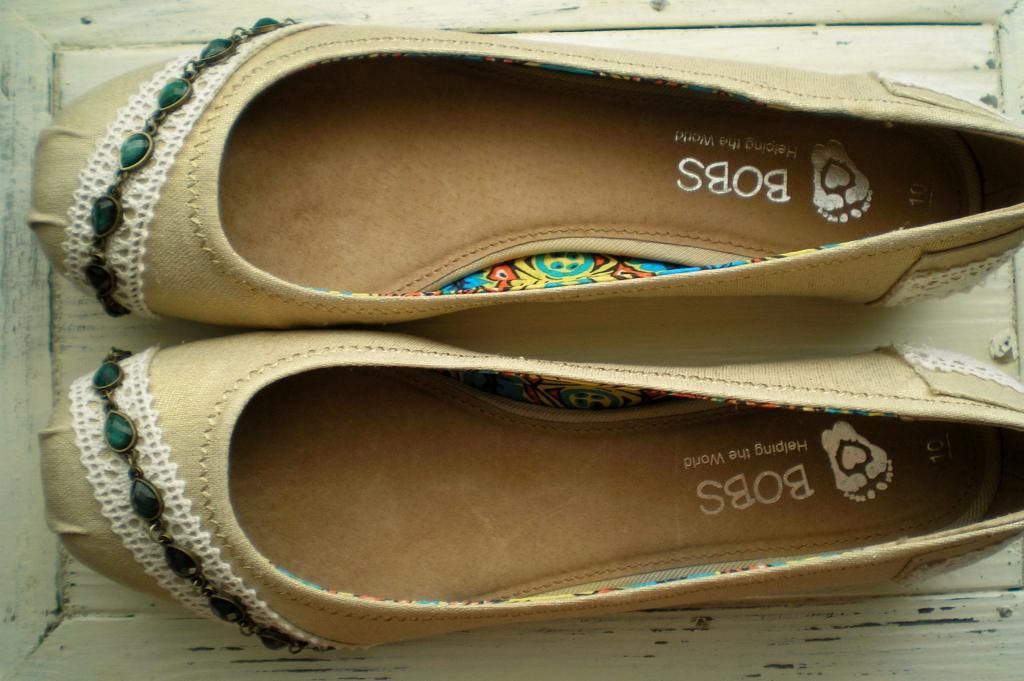
After staring at them for a week or so, I decided some lace and maybe buttons or simple jewels to add a "something blue" would be just the thing. I dug through my ribbons bin and found half a roll of leftover lace from my bridesmaids boxes project (originally $1.99 at the great Hobby Lobby). Grab a glue gun and get to work! I glued the lace along an existing seam running diagonally across the toes so if they peek out under the dress, the details will be visible. On a whim, I added small pieces to the back to cover up the brand tag. Step 1 complete:
For step 2, I debated in the aisles at Hobby Lobby between buttons and jewelry-making accents. They didn't have a huge button selection, but there was plenty to choose from in the jewelry section. I knew I wanted to tie in my "something blue" on my shoes but didn't want it to be super obvious. Bows and the like really aren't my style so in the end, I purchased two strands of turquoise and bronze jewel thing-ys for $2.99 each. More glue, and the inevitable web of hot glue strings everywhere, then ta-da: an awesome pair of one-of-a-kind wedding shoes for about $25!


I'm super happy with them (and their price tag) and can't believe they have to just sit in a box for another 161 days!

8.05.2013

what is marriage?

I promise I'll be discussing some non-wedding/marriage topics soon, but I think today's post title is a vital question, especially for my generation. So...what is marriage, really?

The Oxford Dictionary defines marriage as: the formal union of a man and a woman, typically recognized by law, by which they become husband and wife; a combination or mixture of two or more elements.

You may have also heard that marriage is a commitment, a promise, a covenant, "the long game", the old "ball and chain", a "permanent mistake", and possibly, the end of life as you know it. Unfortunately, with divorce rates as high as ever and negative portrayals scattered across every form of popular media, it is easy to dwell more on the difficulties than the joys.

I've also had several people make the comment that they just "couldn't picture themselves loving one person forever." In response to that, I always think about my grandpa-- in this area, he proved quite the philosopher. 

For much of my life, I remember my grandmother being a somewhat harsh woman. Though God has brought recent opportunities for me to see a new side of her, when my grandpa was still alive, my memory consisted mostly of her nagging him and being demanding. One day, while visiting my grandpa in the nursing home, I asked him how he had loved my grandma for so long? How has they managed to stay married for 50+ years? His response was simple, like so much of who he was. He turned his bright blue eyes to me and firmly stated, "Because I choose her every day."

I have meditated on those words for years. In hoping for my future husband, in my early relationship with Strider, and now in the anticipating of our marriage. What a simple, beautiful perspective on a life spent with the woman he loved. He chose her. Every. single. day.

Just that, just a choice. Not a one-time promise of "I'll love you forever." Not a naive hope that marriage will be wonderful and magical. Not a bitter resentment of a 50-year mistake (despite the many hardships they endured). Just a simple choice to love her -- to wake up every single day and choose to love her all over again, no matter what the day would bring.

That's the love I want. To give and to receive.

Making a one-day promise to love someone forever does seem too huge and impossible for a fallible person to keep. It would be much easier to give up on the one promise that you made 10 or 20 years ago, rather than the choice you make each day. It seems easier to "fall out of love" when the love you promised was just a feeling, not a choice. 

I can't promise to feel the magic every day or look at him with googley, twitterpated eyes. 
But I can promise to choose him every day. 
Promise to work to love him when I don't feel like it. 
Promise to put him first even when I want to be selfish.
Promise to forgive and to fight for us.

Just a choice, every day.

courtesy of staymarriedblog.com

8.03.2013

nuptial nonsense

This post is about wedding things I don't understand or feel are completely unnecessary. It is not intended to offend or to suggest that our planning choices are better than others. If you disagree, that's totally fine, but if not, maybe you'll join me in just asking, "Why!?"

Things I've found to be wedding nonsense:


The 3-month-salary ring rule. If you're rolling in the dough, sure, go crazy--but for all the guys out there that aren't: your girl will love anything you give her (or should). It's about the promise, not the ring. This is the beginning of your life together - don't start it off in debt. Plus, there are beautiful, totally reasonable options out there. Try Gordon's online.

Escort Cards/Place Cards/Seating Charts. So much work, stress, and extra printing costs! Trust me, I know families can get complicated, but really now...if guests aren't grown up enough to find their own seats and play nice for a couple hours, well, maybe they should just sit with the kids or stay home.

The garter toss. To each their own I guess, but to me, this is always awkward. The idea of a husband creeping under tons of layers of his new wife's dress to pull out essentially a piece of underwear that he is going to throw at his friends...uncomfortable to even think about.

Unrealistic bridal party expectations. Since getting engaged, I've heard all kinds of crazy stories about how bridal party members have been treated when participating in weddings for family and friends. Between excessive costs, unfair travel expectations, and "all about the bride" mentalities, can we cool it already? These are your best friends...they love you...please don't make them wish you harm over outlandish, self-obsessed requests. (To my incredible ladies, please throw a shoe at me if I get crazy!)

Alcohol. Whether or not your family and friends drink, bars are a wallet-black-hole for weddings. And why introduce all the drama that can come from including this as part of your special day? No one wants a drunken speech giver. Thankfully, it isn't an issue for us.

Registry complications. Registries are a beautiful thing. This way, guests know they are getting the happy couple something they actually want...and that is awesome. But why do they have to be so complicated? Between choosing what you want, reading reviews to make sure it is a quality pick, choosing where to register for it, and checking the registries periodically to make sure your picks don't become discontinued before the big day....whew! Complicated. Plus, add all the people who just get you gift cards--a kind and helpful gift, but bittersweet because it makes all that registry bother for naught.

The costs. All the costs! This is an obvious one. Go as simple as you like, but inevitably, you're still going to end up spending more than you feel like you need to. And it is pretty evident that vendors play to the emotional bride, trying to coerce you into "needing" something you don't or scaling things up and out of your budget. Admittedly, it's hard not to get wrapped up in a tornado of tulle, tapas, and transportation, but smart ladies...stick to your instincts on what is really worth it. It is just one day. Preparing for your marriage should be a much higher priority than plans for the wedding.

There are lots more, but these are the ones that have become most clear during our planning thus far. What did you nix for your "big day" that no one missed?


Also, just for fun, here's a partial sneak peek at our invites. I'm in love with them!